12L Air Fryer with Viewing Window for Family Crisping
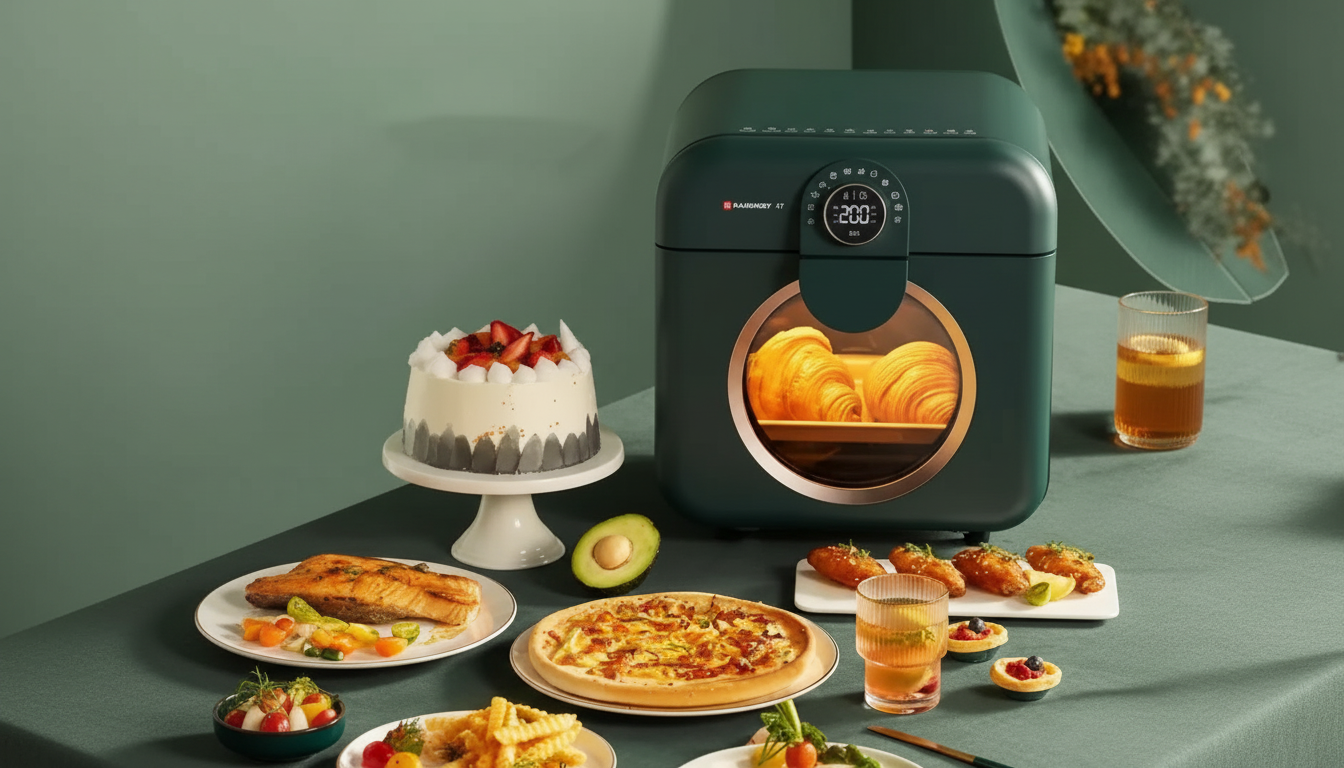
12L High-Capacity Air Fryer with Visualization Window: Healthier Cooking Made Easy
A roomy 12L air fryer with a visualization window makes it simpler to cook family-sized portions with less oil while still keeping a close eye on browning and crisping. The extra space helps with batch cooking and bigger, bulkier foods, while the window supports better timing—especially for breaded items and anything that can go from “not yet” to “too dark” fast. Below are practical ways to use a high-capacity air fryer efficiently, plus techniques that help results come out reliably crisp instead of steamed.
What a 12L capacity changes in everyday cooking
Capacity is more than a number—it affects how often you need to cook in batches and how evenly food crisps. A 12L size is a strong fit for households that want oven-like volume without heating up the whole kitchen.
- Fewer batches for family meals: Larger portions of fries, wings, or roasted veggies can cook at once, which helps everything hit the table together.
- Room for bulky foods: Bigger items (like a whole chicken or thick cuts) have more space around them, which improves hot-air circulation.
- Less kitchen heat than an oven: For small-to-medium meals, an air fryer can reduce the “oven on all evening” effect and speed up weeknight dinners.
- Quick turnaround for mixed cooking: It’s easier to cook a main and then run a fast side dish right after, with less preheat time than many ovens.
Visualization window: why it matters for crisping and timing
Air fryers crisp by circulating hot air. Each time the basket or door opens, you lose heat and disrupt airflow—two things that slow browning and can lead to uneven textures. A visualization window makes “quick checks” truly quick.
- Check doneness without dumping heat: You can confirm color and bubbling on the surface while keeping the cooking chamber steady.
- Dial in the ideal golden brown: Breaded foods, frozen snacks, and seasoned fries often need a narrow finishing window; the view helps you stop at the right moment.
- Catch uneven browning early: If one side is racing ahead, you can rotate, flip, or shake sooner rather than “discovering” the issue at the end.
- Faster learning curve: Seeing how your usual foods behave at different temperatures makes it easier to repeat results next time.
Quick glance checklist while cooking
| What to look for | What it usually means | What to do next |
|---|---|---|
| Pale surface, moisture pooling | Food is steaming more than crisping | Increase time slightly; consider a light oil mist; avoid overcrowding |
| Edges browning faster than center | Heat is reaching thinner areas first | Shake/rotate; reduce temperature 10–20°C (or ~25–50°F) if needed |
| Breading turning dark quickly | Sugar/spices browning early or temp too high | Lower temperature; shorten cook; finish with a brief final crisp |
| Even golden color, bubbling surface | Crisp set is forming | Start checking internal temperature for meats |
Healthier cooking benefits (and what “less oil” really means)
Air frying is often chosen because it can cut down on added oil compared with deep frying while still giving a crunchy finish. That said, “less oil” doesn’t have to mean “no oil.” A small amount—especially applied as a light mist—can noticeably improve browning, help seasonings cling, and make textures feel more satisfying.
- Lower added fat vs. deep frying: Many foods crisp well with minimal oil because hot-air circulation drives moisture off the surface.
- Strategic oil is still useful: A teaspoon or a quick spritz can help color develop evenly (particularly on vegetables and breading).
- Ingredients matter as much as method: Lean proteins, vegetables, and simple starches keep meals lighter without giving up flavor.
- Portions and sauces still count: A crispy cooking method doesn’t automatically make a meal low-calorie if servings are large or sauces are heavy.
For a balanced perspective on health considerations, see Harvard Health Publishing’s overview of air frying.
Best foods to cook in a high-capacity air fryer
Starter time/temperature ranges (adjust for thickness and load)
| Food | Typical temperature | Typical time range | Notes for better results |
|---|---|---|---|
| Frozen fries | 200°C / 390–400°F | 12–20 min | Shake 2–3 times; avoid stacking too deep |
| Chicken wings | 190–200°C / 375–400°F | 18–28 min | Pat dry; turn halfway; sauce after crisping |
| Salmon fillets | 180–200°C / 350–400°F | 7–12 min | Cook to safe internal temp; add glaze near the end |
| Roasted vegetables | 190°C / 375°F | 10–18 min | Cut evenly; light oil + seasoning improves browning |
| Reheating pizza | 160–180°C / 320–350°F | 3–7 min | Lower temp reduces over-browning of crust |
Getting consistent results: airflow, spacing, and simple technique
Cleaning, upkeep, and kitchen safety
For temperature targets and thermometer best practices, refer to the USDA safe minimum internal temperature chart and the FDA’s guidance on food thermometers.
At-a-glance product overview
Recommended picks (in stock)
- 12L High-Capacity Air Fryer with Visualization Window – Healthier Cooking Made Easy
- Bamboo Breakfast Tray with Folding Legs for Sofa Bed, Adjustable Serving Laptop Desk
FAQ
Does the visualization window replace opening the fryer to check doneness?
It cuts down on how often you need to open the basket/door to check browning, which helps maintain steady heat. Thicker foods still benefit from flipping and confirming doneness with an instant-read thermometer.
How much food can a 12L air fryer cook at once?
It’s well-suited to larger portions and batch cooking, especially for family meals. For the crispiest results, avoid packing the basket full—use a loose layer and shake or rotate as needed.
Is air-fried food always healthier than deep-fried food?
It can be lower in added oil and calories than deep frying, but overall health depends on ingredients, portion size, and sauces. A small amount of oil may still be used to improve texture and browning.


Leave a comment